As a photographer, I work a lot on photographs, and recently I also started to spend a lot of time rebuilding my websites. In working on the website, SEO and optimization, it became a great help for me to automatically scale photos in mac os using Automator. In this tutorial, I will show you how to scale photos to a predetermined width with a few clicks.
The following action will resize the original file. Finally, I will show you how to do an action that will create a copy of the file and leave the original.

Auto-scale photos in macOS with Automator.
The Automator application is installed by default on every macOS computer and we will find it in three ways:
- By going to the Finder > Automator Apps >
- Choosing from Lanchpad which default is Dock
- By clicking CMD + Spacebar and typing “Automator”
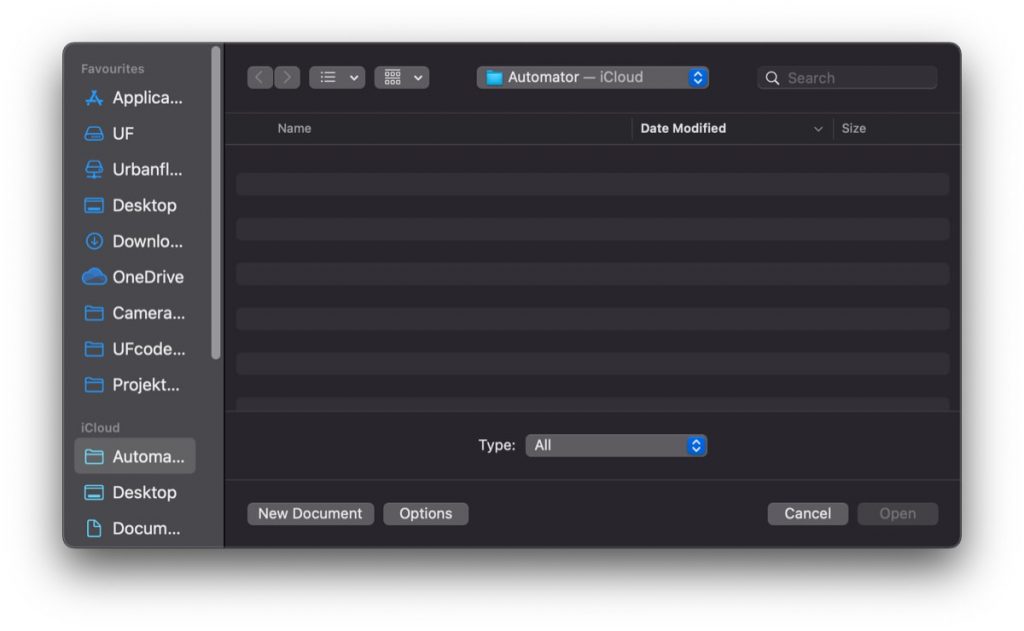
After launching it, we will see such a view. In our case, click “New Document”.
We create a quick action
To create our automation, in the window that appears, select the gear signed “Quick Action” and the blue Choose button.

We choose the type of action
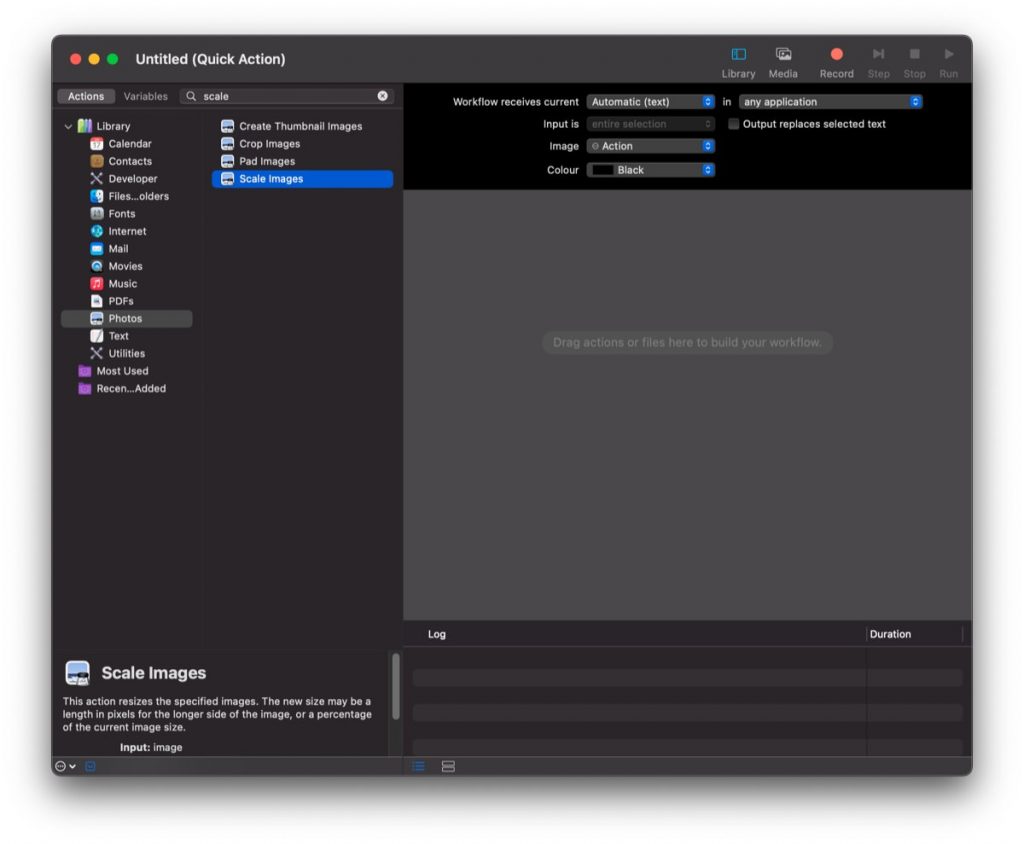
In the new window, in the left column of Actions, we have the Library directory and in it photos. By clicking on it, on the right we will open a list of available actions related to photos. Look here for Scale Images and double-click, or drag to the window on the right in which you can see the inscription “Drag actions or files here to build your workflow.”
We set actions
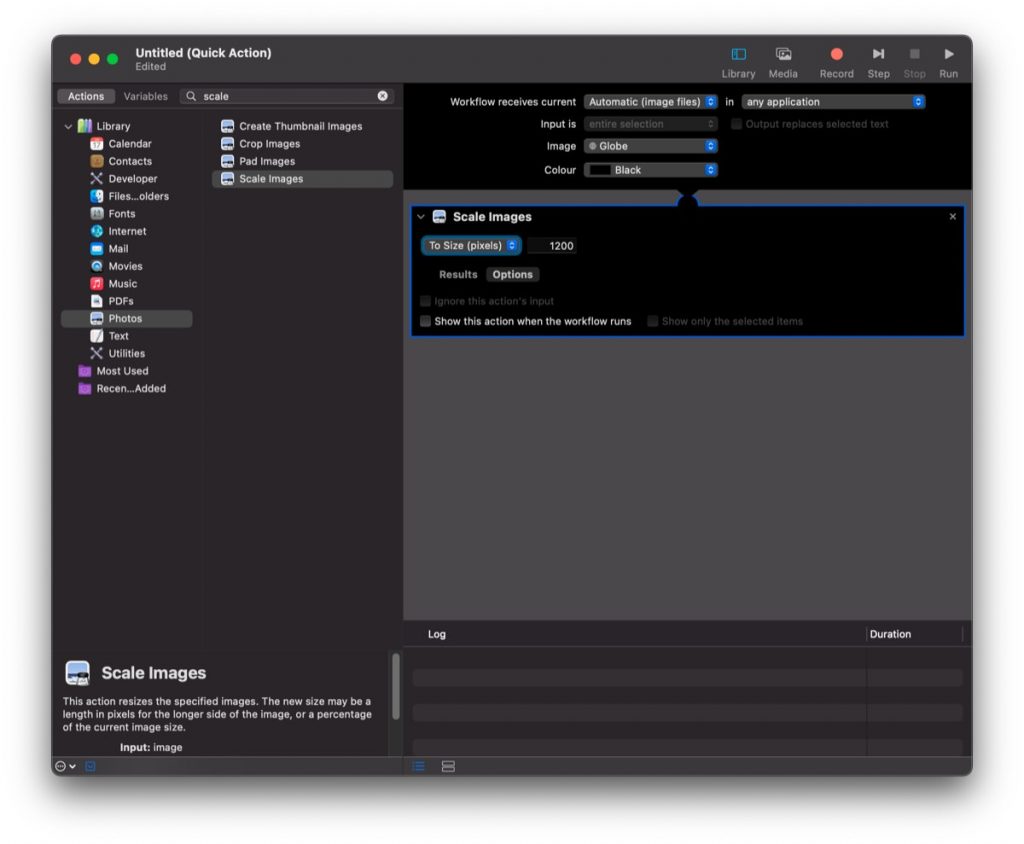
When we drag the “Scale Images” action to our workflow, we can already set what should happen there. At the very top we have such parameters as:
- Workflow recives current – leave on automatic
- in – leave any application unless we don’t want to see it somewhere
- Imputs is – in our case we will not even change
- Image – here we can choose the icon that will appear in the menu next to the name of our action (I usually add a camera). If the photos are to be for the Internet, you can set yourself, for example, a globe (Globe)
- Color – I honestly do not know what changes, but if you want to add a label, you choose Library > Files & Folders > Label Finder Items and there you can add the action of adding a color label
Scale Images
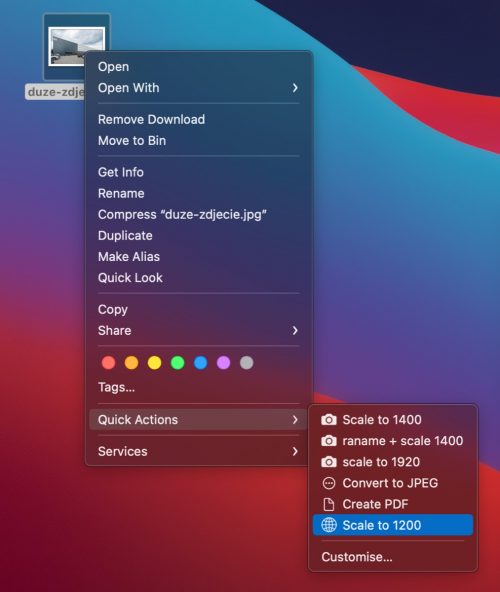
The action you added has the option to set the width of the photos in pixels, or percentages. I always use pixels, and for photos per page I have created two actions 1400 for photos in the gallery and 1920 for covers. In the following example, it is 1200.
How to quickly set any size?
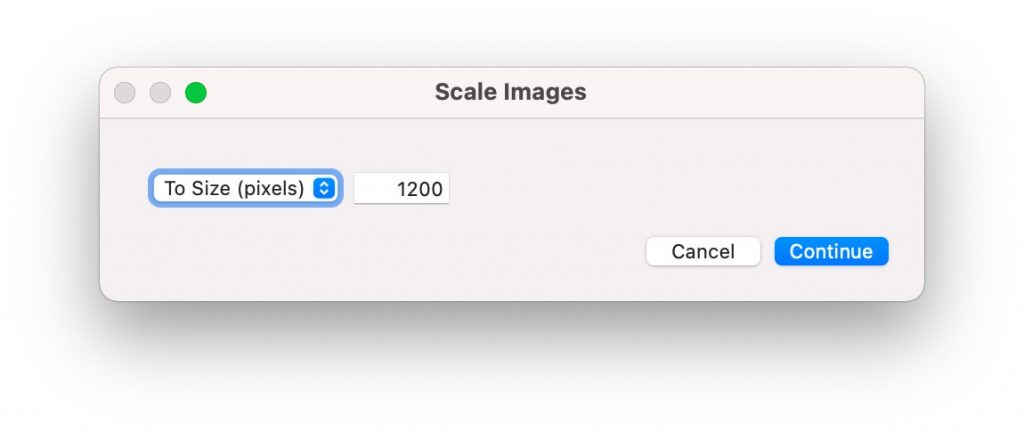
If you want to be able to change this parameter every time, below you select “Options” and select “Show this action when the workflow runs” and each time you start the action you will see a window in which you can specify any width.
Save the action
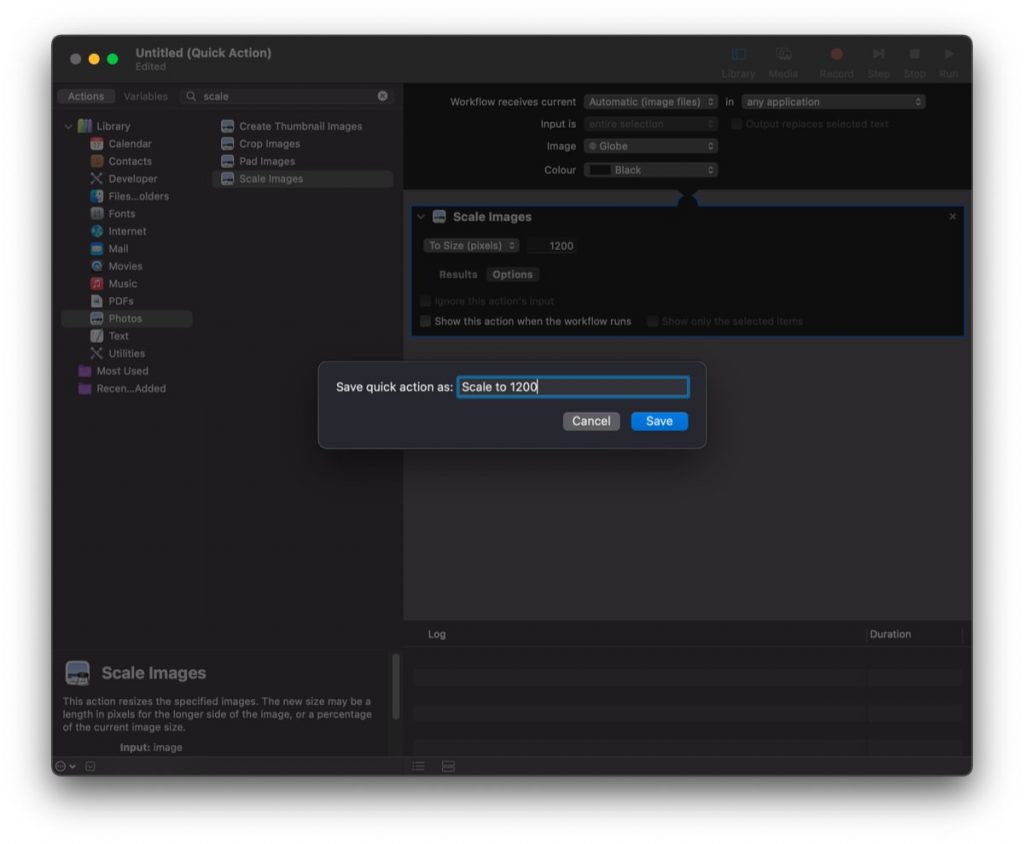
Once we set everything, select File > Save, or click CMD + S and call our action.
We are testing our action
When our action is already saved, we can check if it works. For this, it is best to use a copy of any photo, as the action overwrites an existing file. Then open the context menu by clicking with two fingers on the touchpad, or by holding the CTRL key one at a time. In the menu select Quick Actions and from the list our action. For a while on the top menu bar we can see the gear, and after a while our file will already reduce the width.
In this way, we do not have to open the photos in any application, enter the dimensions and save them every time. Do you like it?
Create an action that doesn’t overwrite a file
If we want to do automation that will not overwrite the original photo, but will create a copy of it, we must add two tasks:
- Copy finder items
- Rename Finder Items: Add Text
The easiest way is to use the window with a magnifying glass and enter these names there.

We set them in the order above. We choose the place where we want to save our smaller photos, and using the Add Text parameter we can add any text to the photo with new dimensions.
I set the saving of files in the Dekstop folder and added to the name “_1200” and set “after name” so that the output files have the file name “filename_1200.xxx”.
What else can Automator in MacOS be used for?
Automator is a very powerful tool and I use only a fraction of its capabilities, but the most interesting of them that I use:
- Convert photos and graphics to JPEG
- Create PDFs from several photos
- Rotate a photo
- Rename files
- Mixing these tasks, e.g. renaming + scaling
Do you want more such examples, or ready-made actions?
