I started my adventure with photography on a Samsung laptop with Windows, when buying which I was guided mainly by the parameters of what it has inside. Then I bought an external monitor and I struggled for several years until I realized that a TN matrix and a cheap IPS monitor are not the best set for working with photography. Although at that time I had an intel Core i7 processor (you know, the larger the “i” the better) 16GB of RAM and some fancy SSD from Samsung, which I bought to somehow it went. It was tolerable, but sometimes the system stated that 16GB of RAM is not enough and will close a program for me, at its discretion. I was sick of it.

Switching from PC to MAC while working on photos
The time has come for a serious decision. At first I thought that buying a laptop for 3000 zł + larger RAM and SSD, then I already have a demon of speed and performance. However, after testing and serious searching, I decided to switch to the MacBook Pro 15 from 2015


Apparently also i7, but instead of 2 is already the 4th generation, RAM the same and a small SSD 256GB but not SATA and already PCI-E, but the work on the Mac was much more pleasant. Nothing spilled out with the same amount of RAM, I did not have to format the disk, because the system had some problems and collected syf, and the feeling of this equipment and the quality of the matrix for those times, it was something that gave me joy from work. Today it already works on MacBook Pro 14 and I sincerely recommend!

Laptop for photo processing?
If you are wondering what laptop to buy for processing and what to look for, take a look at the entry that I have prepared on this topic.
Remember about backup!
Once I installed all the programs on the new computer, I still had to deal with moving the photos and the Lightroom catalog. Here you have to be careful not to make a mess. It is best to rip the contents of the entire drive to an external USB drive. If we are not sure what we will need, it is better to copy everything to an external drive, then successively transfer all files to bring our data and program settings to the state we had on the previous laptop.
At the moment, a decent 1TB SSD for USB 3.2 gen.2, which has transfers at the level of 1000MB / s and it is hard to damage it with shocks we will get for about PLN 500. Check out the Samsung T7 1TB. I use an older version of Samsung T5, which has a transfer rate of about 500MB / s, and you can work on it very quickly and even process photos. Losing a large number of photos and other files will not take you much time.
Where do you keep your photos?
Well, if we have all the photos in a folder that contains all the directories, then we can move it to the new computer and after moving the directory indicate the location of the photos using the “Update folder location” option. If we have photos on a NAS network drive, we only need to point to the path on the new computer. But let’s start by moving the Lightroom catalog, and we’ll come back to that at the end.
I have a separate share on the network drive (such a partition on NAS servers) called Urbanflavour, and in it everything is divided into years. On a laptop, it looks the same.

How do I transfer a Lightroom folder from PC to Mac?
Find a catalog
To move our directory, we must first determine its location, which is very simple. Either we already know where we created the catalog, or we can do it by opening Lightroom Classic and selecting from the menu:
- From the top menu we select: Lightroom Classic -> Catalog Settings
- Hot key: Options + Command + comma
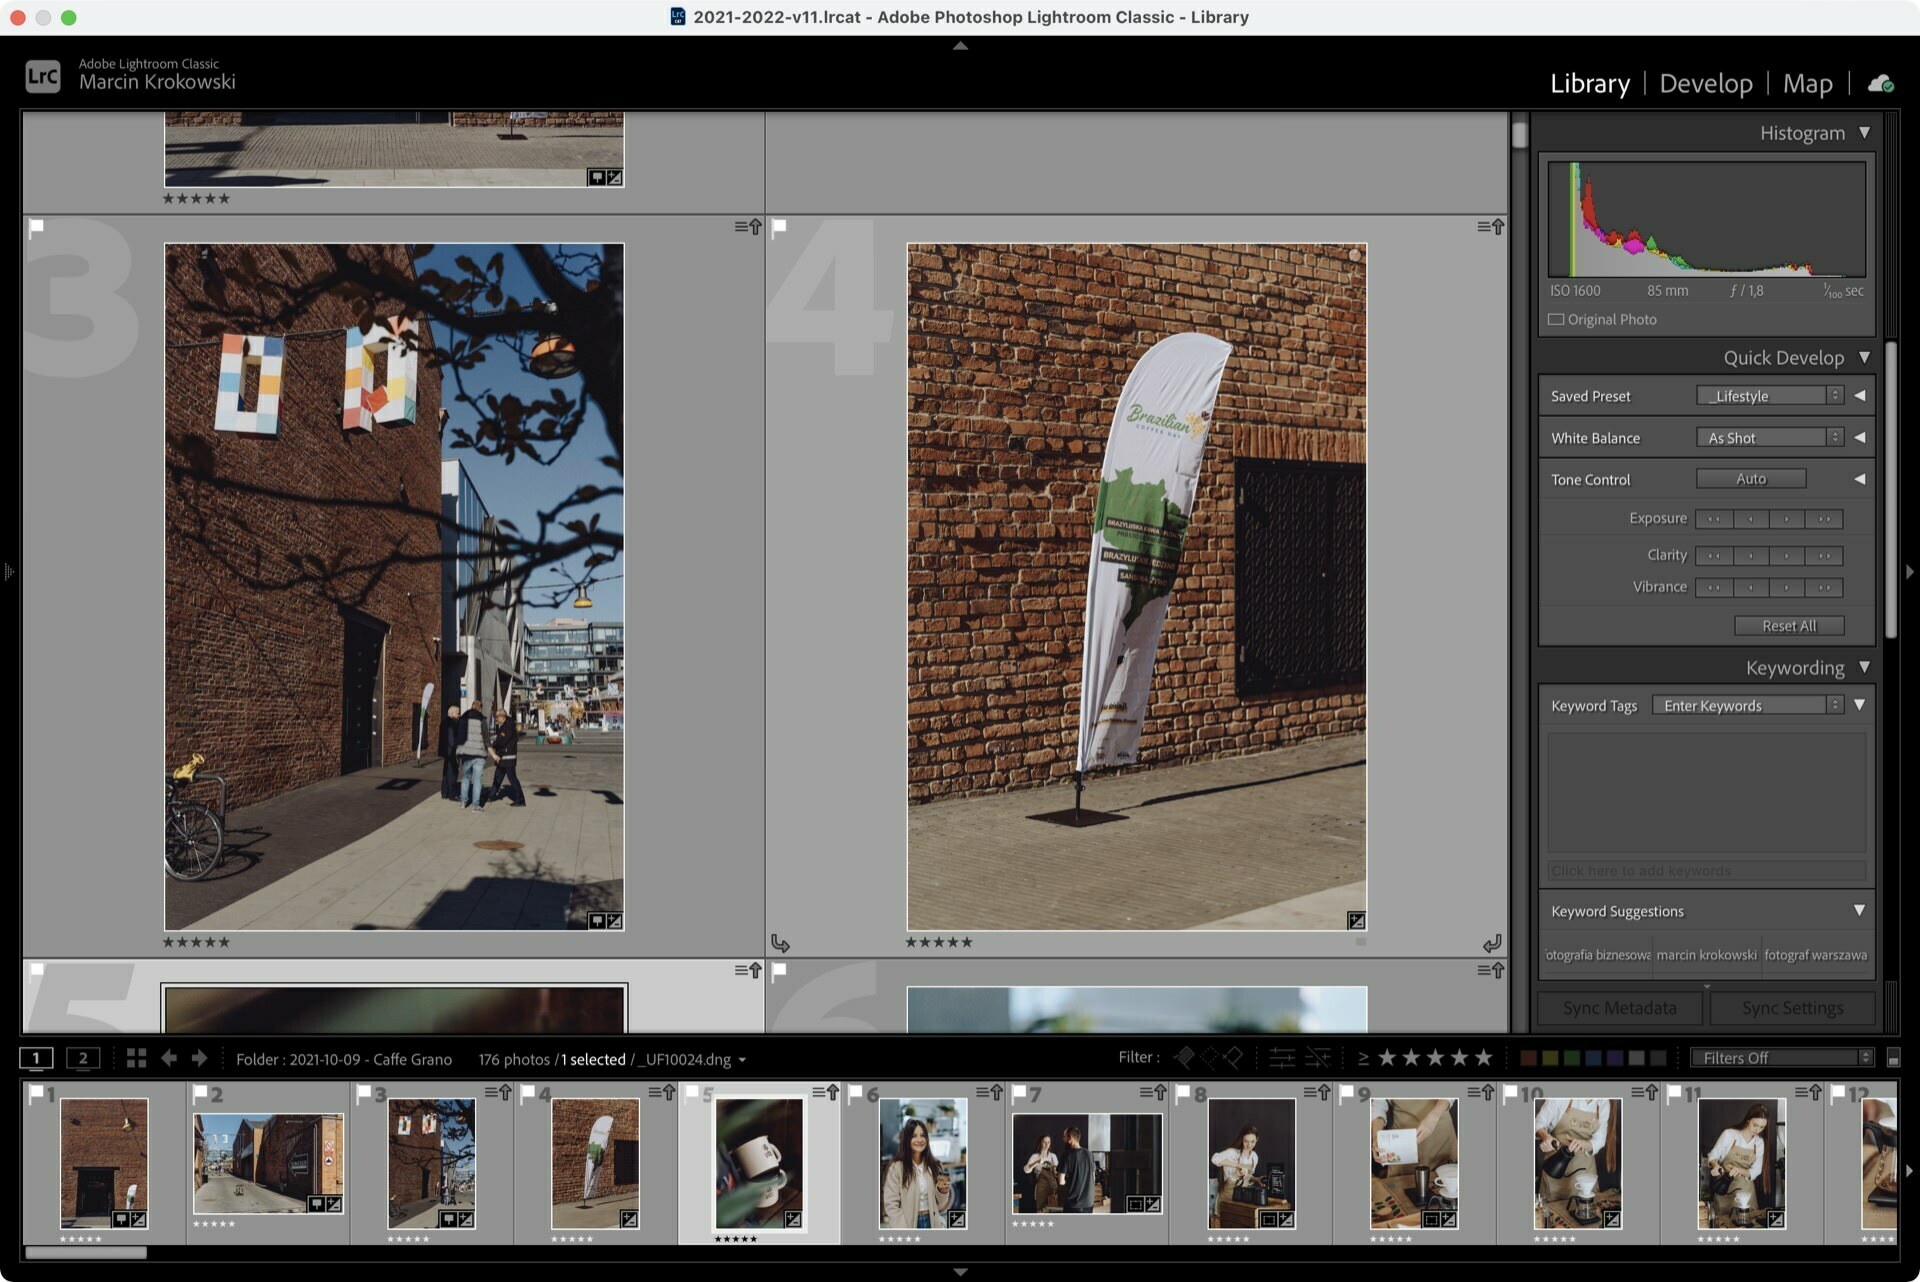
In the Catalog Settings window, the first thing you will see is the General tab which starts with the Information section, and the first one is the path to your Lightroom catalog. Simply click Show and you can already see your catalog. In my case, the catalog string was

In my case it is Location: /Volumes/UF/Catalogs/_LightroomCAT so I copy the catalog _LightroomCAT.

Your directory may have a different name. By default, it’s just Lightroom and it’s in the /Users/[wasza nazwa użytkownika]/Pictures/Lightroom path, but if you created the catalog yourself elsewhere, you do the same.
Move key files
Before we start moving files. Close Lightroom Classic.
Directory files
The most important thing we will care about and is located in the directory folder is a file with the .lrcat extension, and from the Lightroom Classic 11 version also a .lrcat-data file, which is equally important.

Support files
The Files with the ends Helper.lrdata, Previews.lrdata, Smart Previews.lrdata and Sync.lrdata are not that important, so nothing will happen if we do not move them. My catalog with thousands of photos from 10 years has about 2GB, but Previews and Smart Previews files can already take up several dozen GB – these are thumbnails and previews of photos that are created during catalog browsing and photo processing. Lightroom will rebuild the Previews files itself, and We can create Smart Previews ourselves.

Backups
In the folder we will also find a sub-folder called Backups, which creates backups of our directory according to a fixed schedule. To fire up the catalog in a new location we do not need copies, so we can delete them or leave them in their place.

I make such a copy once a month, because I also use TimeMachine anyway.
Settings files and presets
In the folder with the catalog there may also be a Lightroom Settings folder (if we have chosen so before), which contains most of our Lightroom settings and the most important – presets!
By default, however, it is:
In windows – C:users<username>appdataroamingAdobeCamera RawSettings
On Mac – Macintosh HD/Users/<username>/Library/Application Support/Adobe/Camera Raw/Settings
If you use one directory, you could choose to save to the directory. This has its pros and cons (a separate entry will write about it). If you use this option, you need to move this folder so as not to lose your settings and presets.

Important info
If you check the “Store Presets with this catalog” option and have not used it so far, your settings will not be copied. So if you are already at the stage of moving the catalog to a new computer, click on “Show All Other Lightroom Presets” and copy this folder.
And if you want to keep all the settings in the folder with the catalog, you can select “Store Presets with this catalog” and copy all the content to the path in the catalog that Lightroom will create and you can get to it with the button also with the “Show All Other Lightroom Presets” button – see that this is already a path… /[wasz-katalog]/Lightroom Settings
And one more thing. If you use several directories, this may not be the most convenient solution for you, because the new catalog will not see presets associated with another directory.
Folder with presets
The presets themselves can be found exactly in the folder
C:Users[nazwa-użytkownika]AppDataRoamingAdobeCameraRawSettings
Copy the directory to the new computer
You can copy the catalog to a new computer in any way on-line, using a memory card, pendrive or hard disk. I recommend a fast Samsung T7 SSD (successor to T5), which I received from my wife and I also keep an excess of photos on it. When cooperating with other photographers, it allows you to quickly transfer a large number of files, so you can also use such a portable SSD to transfer our photos from a laptop, because external SSDs already have similar capacities of 512GB to 2TB.
Catalog location
If we have a MacBook or another Mac, then we have one very fast SSD, so in terms of performance it does not matter what partition the disk is on. However, in terms of convenience and security for working on photos, I recommend making a separate partition, or rather an APFS volume (volumes dynamically allocate space, so you do not need to determine their capacity in advance) and on it create a place for a directory, or directories, if you have several of them. In my opinion, this is a better solution than the default directory location in the macOS user directories.
For me it is the volume “UF”, in which I have a folder “Catalogs” and in it I put my main LR directory “_LightroomCAT” – /UF/Catalogs/_LightroomCAT. Previously, I had a directory directly on the volume “UF” in a folder called “LRCat” or something similar. It is important that the directory files are in a folder so that they do not mix with other files and folders. In my case, the only folder I created myself is “Plugins” where I put files for JPEGmini and Pic-Time plugins.
Open catalog
Once we copy the directory and Lightroom is installed, just double-click on the file with the extension .lrcat and a blue icon. We can open Lightroom Classic and select File -> Open Catalog. Now it’s all set.
If you haven’t moved the preview files, your photos may take a little longer to load at first. We can also generate Previews, 1:1 Previews or Smart Previews.


Can you provide some insights into how you managed to bring your data and program settings to the same state as on your previous laptop? Are there any specific challenges or considerations that individuals should keep in mind when transferring data and settings to a new computer?
In the context of Lightroom, the essential files to transfer include the catalog files (such as `.lrcat`), support files, settings, presets, and backups. Naturally, for other graphic or photo editing software, the crucial files and steps will differ – that’s a topic for a separate post. It’s worth noting that if a particular program offers an “export settings” feature or allows you to create a user account that synchronizes settings across devices, it’s beneficial to utilize that function. In my case, I store all other files, unrelated to program settings, on a local NAS server or in the OneDrive cloud. This storage strategy ensures quick access and swift resumption of work following a device transfer or failure.
Your article has been incredibly helpful in guiding me through the process of transitioning my photography workflow from PC to Mac. Following your detailed instructions, I successfully transferred my Lightroom catalog and photos without any issues. It was reassuring to know exactly how to locate and move the necessary files, especially the .lrcat and .lrcat-data files, ensuring I didn’t lose any of my editing progress. Lightroom’s flexibility in managing catalog locations made the transition seamless, and now I can continue editing my photos on my new MacBook Pro with ease. Thank you for sharing such invaluable guidance!
Thank you for your wonderful feedback! I’m thrilled to hear that my article helped you transition your photography workflow from PC to Mac smoothly. It’s great to know that the detailed instructions on transferring the Lightroom catalog and files were useful and reassuring. Wishing you continued success and creativity with your new MacBook Pro! If you have any further questions or need more tips, feel free to reach out.
Very informative article Tanks for sharing.
Great, this is fascinating reading. I am glad I found this and got to read it. Great job on this content. I liked it a lot. Thanks for the great and unique info.
Hi Marcin, I am struggling with the move of my Lightroom catalog from PC to MAC.I am also trying to migrate my Lightroom Classic catalog with approximately 60K pictures that reside on a NAS from a PC to a Mac. I also have the path on the PC with a drive letter (D:/pictures/folder1, etc. with D being the drive I mapped from the NAS). I know that Macs dont use drive letters. I was able to migrate my catalog from one PC to another with little effort (usually when I found one Directory manually, it would find all the others itself) but now I am stalled with the migration from the PC to the Mac. I moved the .lrcat file without problems and the catalog is loading as such but there is the Group of folders called “D:” under which are tons of folders with question marks on them. It seems I have to do “Find missing folder” for each of the folders that has a question mark on it. I can remove the question mark individually by locating the folders one by one. Is there no way to do this faster, this will take me hours as I have more than 1k folders? The folders are almost all in two subfolders on the NAS and during a PC-to-PC migration, I was able to select one of the folders and it found all others in the subfolder. Not now. Any ideas what I can do?
Impressive Thanks for sharing this vlog Awesome
Thanks for sharing!
This blogpost is really amazing and the way you have explained each and every step is really impressive. It helped me a lot to maintain my video editing flow, thanks for sharing this valuable post!