Adobe Lightroom Classic is one of the most popular programs for processing and selecting photos. In order for the work to be pleasant, each program should walk fast enough not to hinder it. With Adobe Lightroom Classic it can be different and for a long time many people complained about its optimization in terms of speed. As an event photographer, I often work on a large number of photos and I care about working quickly in this program, so as not to get tired of loading photos for a long time, as well as to give the finished photos to my clients even faster.
In this tutorial, I will show you what accelerating Adobe Lightroom Classic looks like, as well as how to improve your work with this program by optimizing our catalog, program settings and workspace. Let’s start with the basics, and then we will discuss small details that will also speed up your work.
If you work on older versions of Adobe Lightroom, not all options will be available there, but the rules are similar. For versions 4 and 5 I wrote a separate guide on how to speed up Lightroom 4/5.
Equipment
The obvious, obviousness is that Adobe Lightroom Classic will go better on new computers, with super processors, a lot of RAM, a powerful graphics card and super fast disks. Fortunately, we do not have to spend PLN 20,000 on super equipment right away, especially if we care about a laptop and not a desktop computer.
For several years I have been working on a MacBook Pro 15 from 2015 which has:
- Processor i7-4980HQ 4×2.2 Ghz
- Pamięć RAM16 GB GB 1600 MHz DDR3L SDRAM
- PCIe 256GB drive
- Karta Intel Iris Pro
Processor
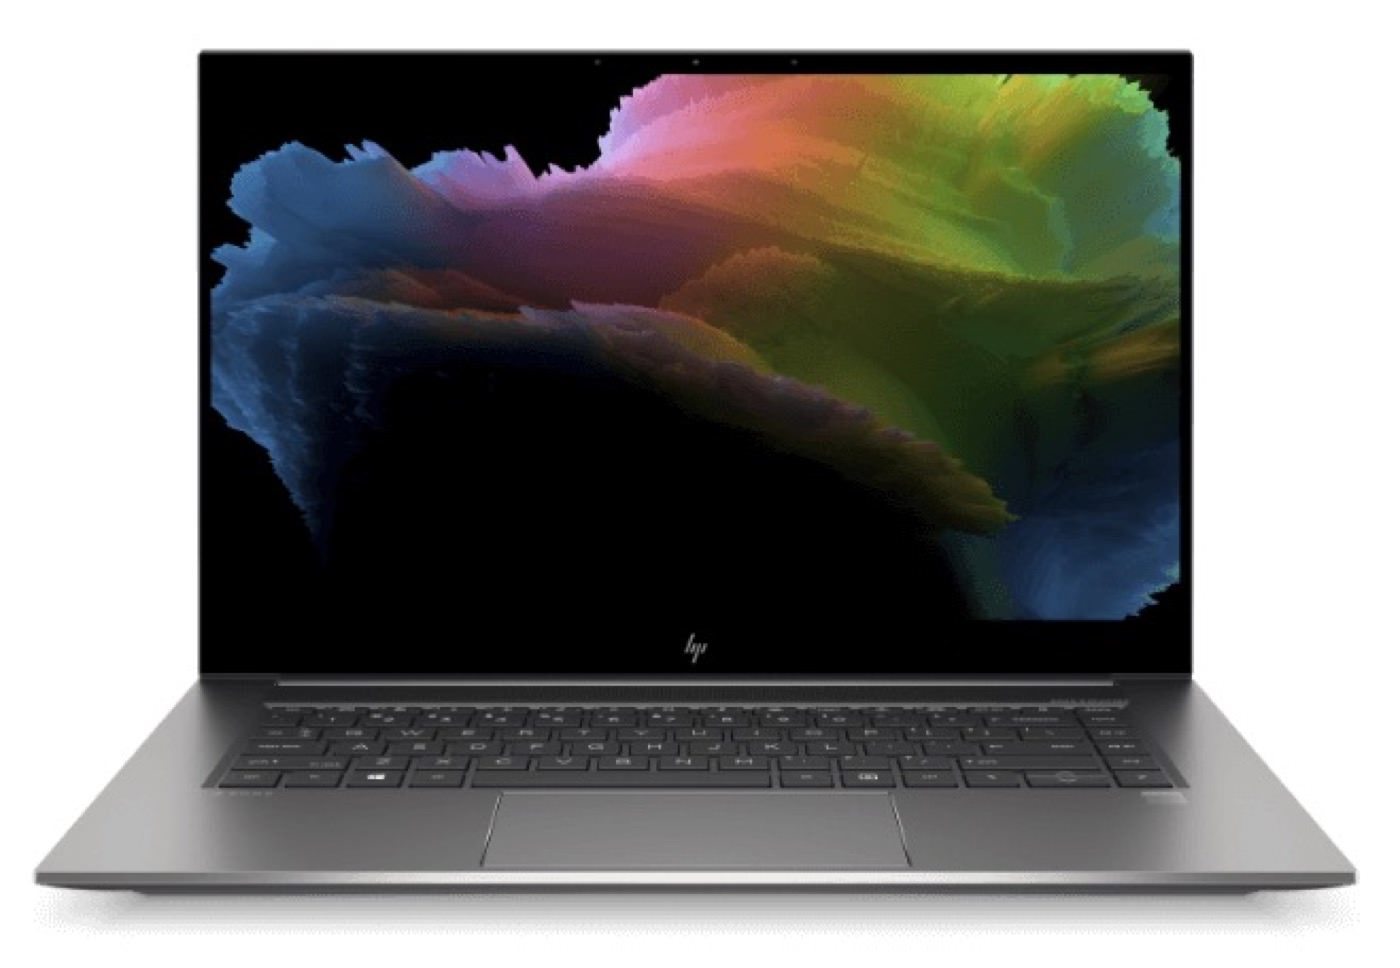
And as for me, everything goes great. At the moment, similar or higher performance can be achieved on laptops with high-voltage Intel Core i5 8th or 9th generation processors that can be purchased below 4 thousand. € You can read more about laptops for photo processing in the entry on choosing a laptop for processing photos from events. The most important is the power of one core, we do not need them, we do not know how many. In the case of laptops, if we care about performance, it is worth looking for processors with the letter H at the end of their designation, e.g. Intel® Core i7-10750H™, which in contrast to the U version (and recently also with the G designation and a number specifying the power of integrated graphics, eg G7). Recently, there has also been a large selection of 4th generation Ryzen processors also marked with the letter H, which also give high performance and are usually cheaper than computers with Intel processors. Most of them can be found in gaming computers, but also in mobile workstations, or some premium computers, i.e. the new HP Envy 15.

Ram
As you can see, there is a lot of RAM, but still with a clock speed of 1600 Mhz, where new laptops already have twice the clock speed (about 3000 Mhz). When processing photos, I think that 16GB is the minimum, 8GB is risky, and if you work on several programs or mount video, it is worth thinking about 32GB. If you have such a possibility, it is worth expanding the memory to 16GB. RAM for Kingston HyperX Impact 16GB DDR4 2666MHz CL15 laptop costs about 400 zł and 32GB you can get 620 zł.

Hard disk
My hard drive is only 256GB, but it’s a PCIe SSD. Sometimes this can be problematic, but with a well-organized workflow, you can deal with it using Smart Preview and NAS drive. I also use a Samsung T5 500 GB external SSD which is very efficient and helps me with larger orders.
Disk capacity is an individual matter, it is known that the more the better. In a new computer, I would bet on 1TB of capacity. The speed of the interface and the disk itself is also important, starting from the slowest ones are HDD (SATA) < SSD 2.5″/M.2 SATA < SSD M.2 Pcie. For more information, I invite you to the entry about laptops for processing photos from events.

Display adapter
To process photos, we usually need a good Intel Iris, or even intel HD. In Lightroom, the processor plays the biggest role, and only for some time its performance begins to be affected by the graphics card, but usually it is only responsible for generating previews and exporting photos. For most of the work will rest. A good GPU can be useful when working on several screens in high resolution, or video processing.
Hardware summary.
For smooth operation, it is best to start with a processor with the letter H at the end. 16GB RAM and fast SSDs preferably PCIe. If you already have a laptop, you can add / replace only RAM and disk. In the case of a graphics card, you can try an eGPU case for a desktop graphics card, e.g. Razer Core V2, but it’s an expense of 1500 zł for the case itself, to this you need to add a graphics card.
So much for the equipment so far is enough, the rest everything else you will pay 0 zł.
Updates
Neglected by some, and equally important is the update of the system, graphics card drivers and other components, Adobe Creative Cloud and Lightroom applications. I’m currently running Lightroom Classic 10.1.1 which currently handles GPU support better and has better performance overall and previous ones.
File location
It is important that our Lightroom and directory files are located on SSD drives in the computer, and if we have several disks, it is worth placing the application, directory and cache folder on separate disks (separate partitions, do not make a difference in performance). Lightroom itself does not even allow you to place the directory on external drives.
Launch Lightroom 64-bit (Lightroom 3 and 4)
If you have an old version of Lightroom, make sure it works in the 64-bit version. If you have a 64-bit system, it should be set automatically. On Windows, you can check it by clicking search on the application bar annotation “x64”. On Mac OS, you need to find the Lightroom icon, right-click and check if the “Open in 32-bit mode” option is unchecked.
Launch the Lightroom interface in Low Res mode
You will get a big performance boost by running the program’s interface in low resolution mode, but it only works on Mac OS. This does not affect the photos, but only the interface of the program itself, which for most people is not even felt. To do this:
- Enter the Finder > Aplications > Adobe Lightroom Classic
- right-click on the Adobe Lightroom icon Classic.app
- Choose Get info
- In the General tab, select the “Open in Low Resolution” option
- Restart the program (if it was enabled)

Ready! Ugly but it will walk fast. We can start to rummage through the settings of the program itself.
Catalog settings
I wanted to start with the import settings, but in order not to do you twice as much work, let’s start with the directory settings. Enter:
- MacOS: /Lightroom Classic > Catalog Settings/
- Windows: /Edit > Catalog Settings/

General
Here we have basic information about the directory and the Backup option. It is worth noting that damage or loss of the catalog will not affect your photos. You will also not lose photo editing data if you select Automaticaly Write Changes info XMP* in the Metadata tab. You can only lose data about flags and color labels on photos and folders/folders in your library. If you mark photos with stars, this information will remain in your files.

* automatic saving reduces performance a little, but it relieves us of manual saving by selecting photos and clicking Ctr + S / CMD + S. With some settings we will have such a dilemma and some settings are an individual matter depending on the workflow and priorities
I prefer to copy once a month so as not to waste time on frequent backups. The copy itself does not take up much space, because it is a zip package of a .lrcat file that is not large by itself. For me, the annual catalog takes about 600 MB and a copy of about 300 MB after compression.
In general, I’m not afraid of losing the catalog, because I save photos to DNG format where I save:
- Edit data (what we do in the Develope module)
- Asterisk markings
- Geotags
You can let go of the backup of the directory if it is enough for us. If we damage it, we can create a new catalog and import all the photos again.
File Handing
Here we have information about the usual views of Previews and Smart Previews files.
- Preview Cache is responsible for the file … Previews.lrdata
- Smart Previews is responsible for the file … Smart Previews.lrdata
These are files in the folder with the LR directory and containing our thumbnails. We have no influence on Smart Previews, but we can set the quality of standard Previews here. Instead of rendering RAW files every time, which would be terribly CPU-intensive, Lightroom creates appropriate previews in JPEG format to speed up the work.

- Preview Cache: If we work on one screen, we can set the resolution to Auto so that LR sets it for us. I prefer the highest possible choice of 2880 pixels because this is the resolution of my laptop’s screen, and the 32″ QHD monitor has 2560 pixels. By making a selection in full screen, I do not lose quality, and Lightroom still goes fast. At this point you can try lower resolutions if you have FullHD screens or you always work with open panels, you can set 2048 pixels. If you set the resolution too low, Lightroom can generate additional views in the background when zoomed in. It is worth experimenting a little.
- Preview quality: I always set the quality of previews to high, if I want to increase performance at the expense of the quality of previews, I only reduce the resolution of photos.
- Automatically discard 1:1 previews: Most of the time we just need Standard Preview, but enlarging the photo to 100% or more we need 1: 1 previews that create a JPEG file where each pixel from RAW corresponds to the pixel preview in JPEG. If we create a lot of such previews, whether editing photos or at the import stage, we fill up our hard disk very quickly.
Here we must specify our preferences for how long we will need 1:1 files and when Lightroom should delete them. He can do it every day, once a week, once a month or never. If we still have a lot of disk space, it is worth leaving them as long as possible because by enlarging photos our computer will not be engaged in creating previews on the government. We will discuss this topic at the stage of importing files.
Metadata
This tab refers to metadata that is created when editing photos, describing them with keywords, or geotagging.

Editing
- Offer suggestions from recently entered values – I did not notice that it clearly affects the performance of Adobe Lightroom Classic. This is an option that likes to accurately tag their photos with keywords. By marking it when describing photos, we get keyword suggestions based on when they were taken and what words we used before. I leave marked.
- Include Develop Settings in metadata insider JPEG, TIFF, PNG, PSD files – Saving metadata in these files also doesn’t have much of an impact on performance. I leave them checked, in case the directory fails.
- Automaticaly write metadata into XMP – For performance, you can uncheck this option, but then we must remember to save changes manually via CMD + S or by selecting Metadata > Save Metadata to File.
If the data is not saved, on the grid we will see such an icon in the upper right corner of the thumbnails, which we can click or use the CMD + S shortcut on the selected photos.

Address Lookup
If you geotag a photo, these are two useful options.
- Look up city… – If we mark the photos in the Maps tab, or our camera saves data from GPS, Lightroom will pull the nearest address from Google Maps, adding to the coordinator also such data as country, state and city.
- Export adress suggestions… – Choose this option, if you do not enter the address yourself, then Lightroom when exporting files will fill them with the suggested ones.

For performance, we can uncheck these options. For a better description of the photos, I leave these options enabled.
Face Detection and EXIF
I leave both functions unchecked, because I do not use face detection, and by the way it would be very burdensome for the program looking for them in each photo.
In the exif tab, we can force saving the date and time to RAW files if we change them in Lightrom. I try to keep an eye on this information already at the camera level before each order, so that the shooting time does not go between the two bodies, so I do not select this option, although it should not have a major impact on performance.
So much for the catalog.
Lightroom settings to speed things up
We have finished setting up our directory, so now let’s go to the settings of the application itself. We do this by choosing:
- Windows: /Edit > Preferences/
- MacOS: /Lightroom Classic > Preferences/
Now let’s go through all the tabs one by one.
General
Here the settings depend, as usual, on our workflow.

- Default Catalog – Here we can choose what directory to use Lightroom at startup. I set the last used, because each subsequent creation once a year. Thanks to this, I do not have to choose it every time at the start.
- Show import dialog when a memory card is detected – I leave marked, because 98% of the situation when I insert a memory card into a laptop, it wants to rip photos from Lightroom, and this immediately opens the import window to me.
- Treat JPEG files next to raw files on separated photos – I do not select this option, because when taking RAW + JPEG photos in the camera after importing, I would see both files, and if I import them, I only see the RAW file at work. In my opinion, it is best to import only RAWy.
- Select the “Current/Previous Import” selection during import – I leave them marked, because after importing the photos I will immediately be in the place where I imported the photos.
- Replace embedded previews with standard previews during idle time – I leave this option enabled just in case. I’ll explain what’s going on.
If we import RAW files, most cameras embed in them a small preview in JPEG format that we can use in the preview of photos. These are such thumbnails. The latest lightroom already gives us four preview options when importing photos:
- Minimal
- Embedded & Sidecard
- Standard
- 1:1
For photojournalists who care about time, the first two options allow you to quickly select photos by thumbnails. The Embadded & Sidecard option uses small previews from RAW files, and if we take RAW + JPEG photos, then JPEG will be our Sidecard that serves as a preview. So LR doesn’t have to sweat extra, but when you take pictures with a black and white preview, it will be a bit of a fuss because the thumbnails will be black and white, even though the RAW file has color information.
However, when opening photos in magnifier mode where you can see them in a large size, and even more so enlarging Lightroom must create Standard or 1:1 previews. By choosing the Replace embedded previews with standard previews during idle time option, we will save time on import, and during the idle the program will create standard previews.
Photos using embedded previews also have a small icon of two arrows in the upper left corner on the thumbnails.

If you create Standard or 1:1 Previews on import, it will not change anything in your work and I recommend sticking to it, and spend a longer time on import to make a jackdaw.
Performance
Tabs Presets, External Editing, File Handing, Interface will be omitted because they do not affect performance.

Camera RAW
- Use Graphic Processor – I leave it on OFF, because I have an old MacBook Pro from 2015 with Intel Iris Pro and so far using the graphics card caused strange artifacts that disappeared only after restarting the application. If you have a similar, or do not want to use the battery of your laptop, you can not use this option.
With new computers, and even more so with a dedicated graphics card, you can leave the Auto option, because it will speed up the work of the program, creating thumbnails and exporting.
Camera RAW Cache Settings
We only make sure that the Cache is on the computer’s SSD and possibly clean it.
- Maximum Size – Set to 30-50 GB.
Develop
- Enable hover preview of presets in Loupe – This is a preview of presets in the Develop module, in the Navigator panel. If you do not know your presets, this option may be useful to you, but if you do not want to render them in the Navigator window, it is better to uncheck this option to increase performance.
- Use Smart Previews instead of Originals for image editing – This is a great option because Lightroom uses lightweight Smart Previews when editing photos, which gives us a big jump in performance. This may affect the quality of the photos we see, but when exporting, the program uses the correct RAW files. so in the end it does not affect the quality of the photos.
- Generate Previews in parallel – if we use 4 or more core processors, this option allows you to create several previews at the same time at the same time. By selecting this option, we will speed up the import of photos.
Lightroom Sync
If we synchronize photos and collections with the cloud, here in the Options tab we mark Prevent system sleep during sync , thanks to which our computer will fall asleep only after synchronization with the cloud. It is better to do it after finishing work than to synchronize during work time, which also slows down the work of Lightroom.

Hiding unnecessary modules
After setting the program, it is worth improving our workspace, which will also speed up our work.
In Adobe Lightroom Classic, we mainly use two panels / views to work. Each of them gives different tools for work with photos.
- Library – At this point, immediately after import, we make a review and selection of our photos. In this view, we also see our folders and collections. It will definitely be useful to us.
- Develop – This module is used for photo editing. Here we can select ready-made Presets, or enter all the parameters of exposure, color, curves, exposure, sharpening, denoise, calibration and local tools. This is the most used module and we will leave it as well.
The rest of the panels are Map, Book, Slideshow, Print, and Web. I leave only the Maps module to geotag photos, and hide the rest, because it is unnecessary for me when working in Lightroom.
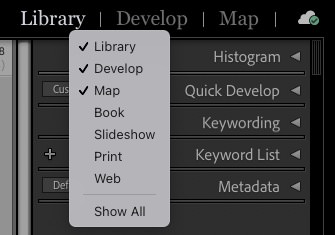
To remove panels, just right-click on the top panel where they are located and uncheck from the list that appears.
Customize your toolbar
Toolbar translating into Polish is a toolbar. It is located under the main photo view or photo grid. To hide or show it, just press the “T” key on the keyboard.

Depending on what module we are in, whether it is Develop or Library, its functions may vary.
Toolbar in Library module
We can use these tools from the library view, I will not discuss them here now, but it is worth clicking through them. It is also important that by changing View modes, we can also have different tools in each of them:
- View modes
- Sorting
- Flagging
- Color Label
- Rotate
- Navigate
- Slodeshow
- Zoom
- Draw face region
- Grid overlay
It is worth getting acquainted with them and choosing only those that we use or want to use. The rest can be turned off by clicking on the triangle on the right and unchecking them from the list. I leave here only the order of photos to choose Custom Order and arrange them in your own way. I do the rest of the things with keyboard shortcuts, and I leave the tostlbar hidden by pressing the T key, which gives me more space.

Customize Panels
Each module has two side panels that can be customized in the same way. By clicking on any panel with the right mouse button as before, we will expand a list from which we can disable those that we do not use.
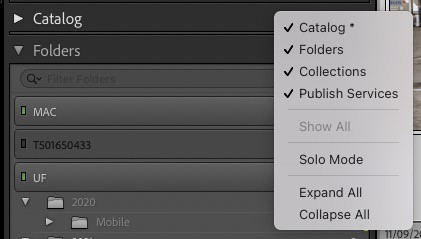
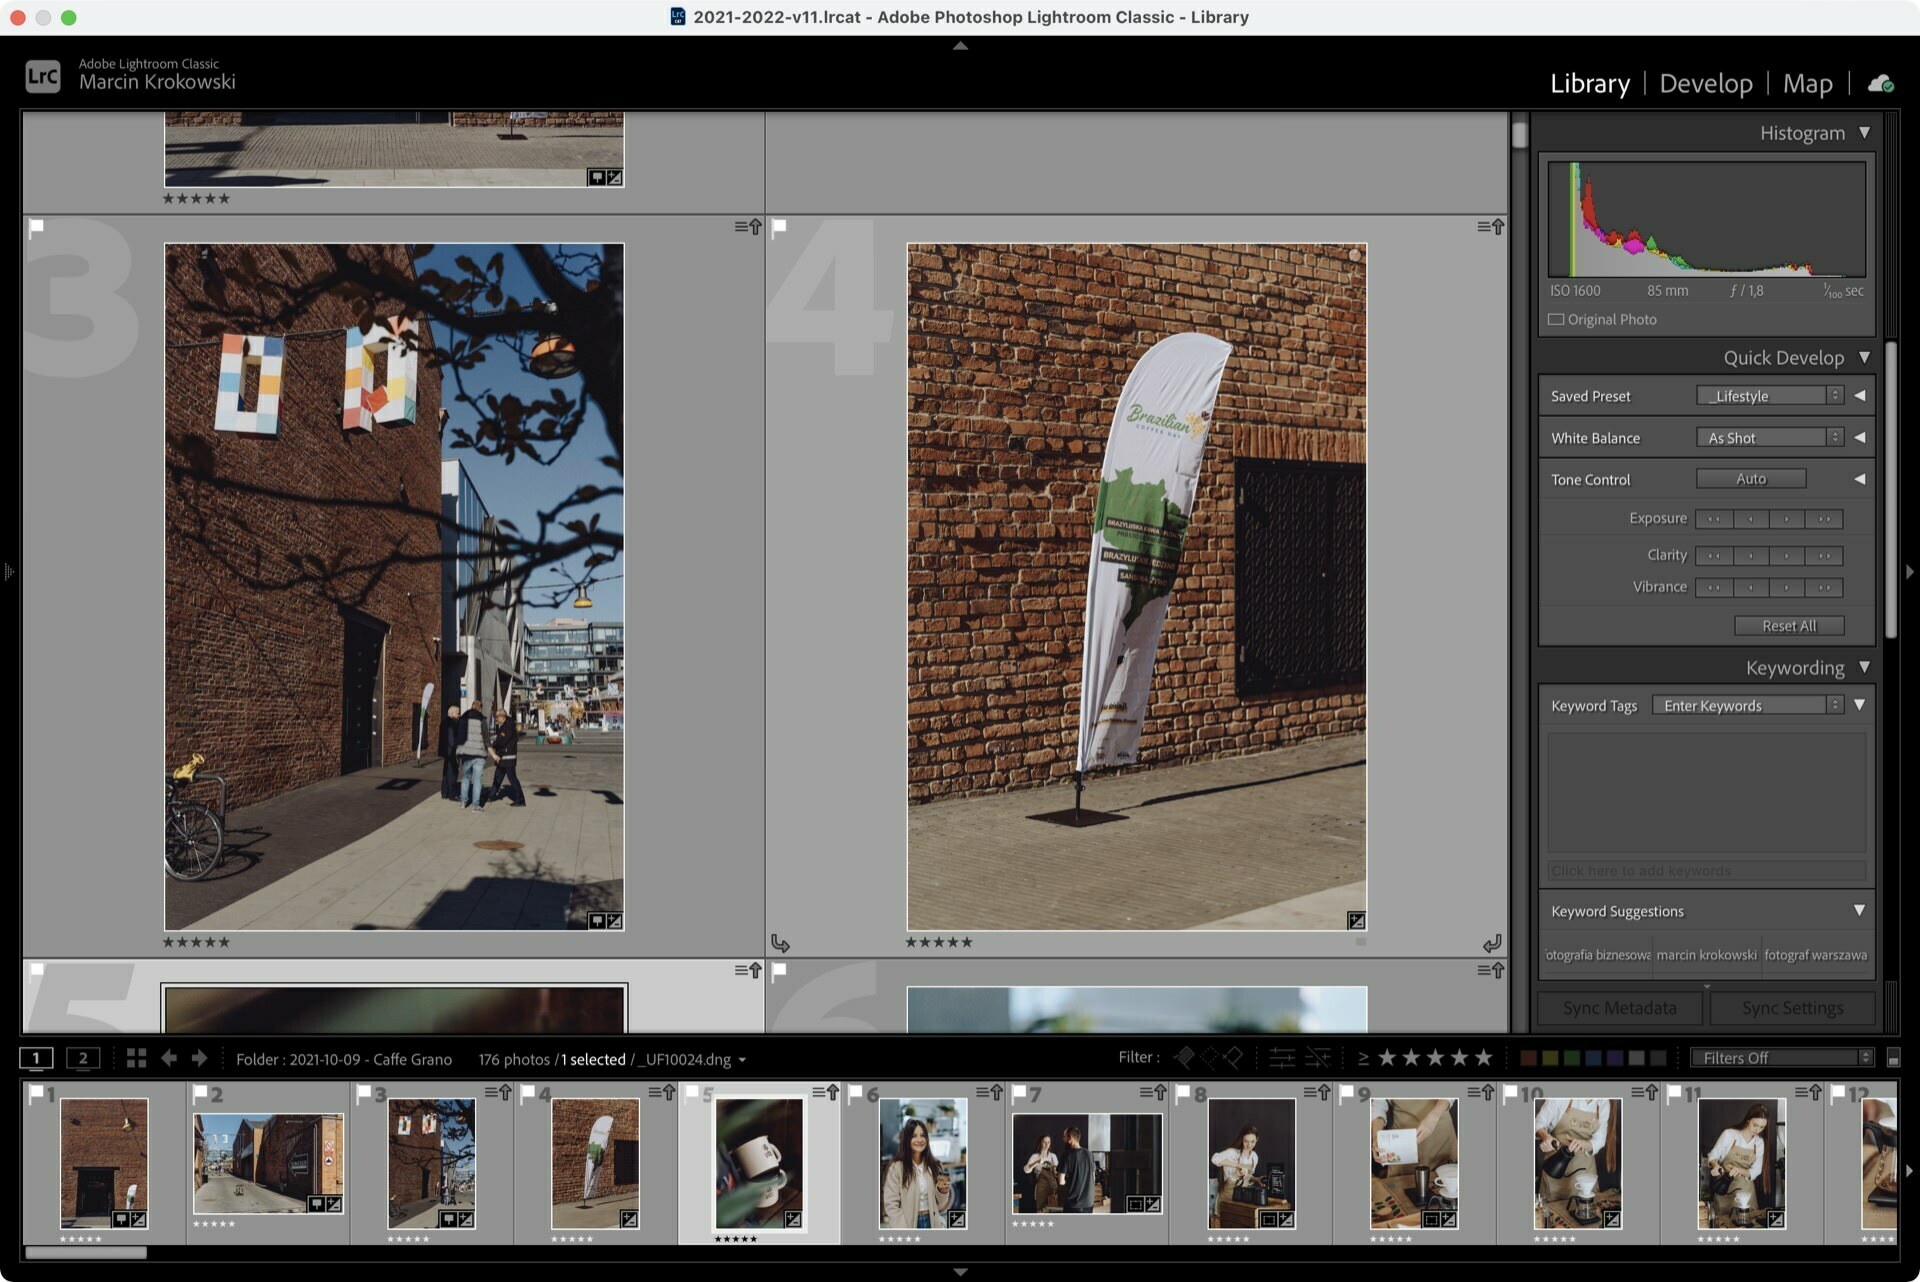
Hide Histogram
In the right column we do similarly, but click on the next panel under the Histogram. At this point, it is worth minimizing it, which will affect the performance of Lightroom, which I will write more about later. The same can be done with the Navigator window on the left.
The Navigator panel renders a small preview of each photo to help us determine which part of the photo we are zooming in. In most cases, this is unnecessary for us, and the most important zoom options such as Fill / Fit and zoom degrees (which can also be determined) are visible.
We don’t need a histogram in Lightroom. This is just a digital interpretation of what the matrix has written, more important is what the human eye sees in the photo. If you have a well-prepared workplace and a calibrated monitor, you can safely hide it. In this way, the processor does not have to recalculate it after each change.
Import photos
Importing photos also has an impact can give acceleration adobe Lightroom Classic. Because the size of the previews will depend on how much work Lightroom will do during processing.
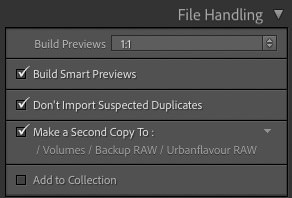
File Handing
Importing photos, on the right in the File Handing tab we have the narrowest option Build Previews where we have to wyoboru:
- Minimal
- Embaded & Sidebar
- Standard
- 1:1
Here we have to think about whether we care about import time or performance, and how we will work on the photos. The optimal solution is to create Standard Previews whose properties we have previously set in the catalog options. If we do not enlarge the photos 100% and work on the whole photo, this is the perfect choice. Similarly, with the lower minimal and Embaded & Sidebar options, with the difference that Lightroom will still create Standard Preview, and then 1:1.
The downside is that by enlarging the photos, the program will start to create a 1:1 preview. To avoid this, we can select the 1:1 option but this will extend the import of photos and significantly enlarge the file with previews (Previews.lrdata) it is worth selecting the time of keeping these previews in the directory options.
I only use Minimal and Embaded & Sidebar to create a preview for a large number of photos I’ve worked on before and track down the ones I need, or I want to quickly import files from a memory card. Then I don’t need a big preview. Large Previews can then be created at any time.
Build Smart Previews
For some time now I have been using this option by default, because:
- Smart Previews speeds up the processing of photos if we use Smart previews and we have a selected option in the settings.
- If we transfer the photos to an external drive or server and take the laptop with us, then we can still process the photos. We will need the original files only when exporting photos.
Don’t import Suspected Duplicates
Of course, we mark not to add previously imported photos. It may happen that when taking photos at party A, we ripped photos and did not format the card before party B. Then, importing photos B from the same card, we will skip those previously added.
Make a Second Copy To
This is the second place to save photos. It has nothing to do with performance, and it extends the import, but it is worth having an additional copy.
I save the photos I will work on on the laptop disk and always make the second copy to the NAS server. If something deletes unintentionally when editing or destroys the laptop, then there they will wait safely.

